
Bantam built the first jeep!
Of those players in the field leading to the standardized wartime jeep, American Bantam Car Company was the smallest with “an approximate investment of one million dollars and employing around 450 men.” Bantam had been through financial difficulties and receiverships, had applied to the Reconstruction Finance Corporation for first-mortgage loans dating back to 1938.
During the late 1930s, Bantam had tried to interest the United States War Department in the utility of their small cars. While several where tested, the immediate results went nowhere. At this same time, the US Army had been testing various concepts for 4×4 (four-wheel drive) vehicles. They had recently purchased many 1/2-ton 4×4 trucks. While these trucks performed fairly well, they were just too big, too heavy, too long and needed refinement.

In accordance with the agreement in its bid, the American Bantam Car Company built and delivered the first pilot model to Holabird in 49 days. During the construction of this original model, the bugaboo of weight cropped up again. It became evident to both Bantam and Holabird that strength and material limitations, as well as other engineering factors, would make it virtually impossible to meet the 1275 pound weight requirement. Hence all 70 jeeps weighed some hundred pounds more, although still less than the 2100 pound limit set in the tentative specifications of July 7, 1941, or the still later revised military characteristics of July 3, 1942, which raised the final weight of the jeep, for the period covered by this study, to not more than 2450 pounds.

When the jeep reached the using arms (Infantry, Cavalry and Field Artillery) in the field its success was instant and sensational. At posts, camps, and stations all over the country, it won the admiration of everyone for the manner in which it performed. The demonstrations it gave of climbing and leaping, and its all-around ability to push its way through tough situations, impressed all beholders…Its four-wheel drive proved that it could operate over the roughest terrain. Water eighteen inches in depth was forded with ease. Although riding in the jeep was far from pleasure driving, it auxiliary transmission, providing six speeds forward and two reverse enabled it to hit a mile-a-minute clip on the highway or claw its way upgrades of 60% or better, in low. In its appearance, too, the jeep was radically different. Soon well-known to every school-boy on the street were its squat, rectangular, utilitarian shape in its coat of olive-drab, lustreless enamel that had been developed shortly before; its low silhouette; the flat fenders on each of which an additional man could be carried if necessary; the heavy brush guard protecting the front; the folding windshield and detachable folding top or canopy; the pintle and towing hooks; the heavy duty mud-and-snow tread tires; and the front and rear blackout lights.”
The jeep proved so very successful that it has remained in production with minimal changes so that even today “every school-boy” still recognizes a jeep vehicle. Unfortunately, the jeeps’ success would not be tied to the success of the American Bantam Car Company. The company would lose the bid for the standardized war-time jeep to Willys-Overland. Then through negotiations, Ford Motor Company would be selected as the alternate producer of the Willys jeep. Bantam after delivering its last Bantam BRC would never again produce cars for the government or anyone else. During the war, it produced trailers pulled by the Willys MB and Ford GPW. The company survived the war for a time producing civilian versions of the jeep trailer. The company was bought by another concern and quickly faded from the scene. A sad ending for the first designer and builder of the jeep.
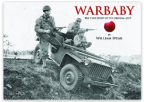
For even more about Bantam and other early jeeps, check out Jeep – Its development and procurement under the Quartermaster Corps, 1940-1942 . Warbaby by William Spear is an excellent read on the Bantam Car Company’s effort to produce the jeep for the War Department in 1940-41.


 The original question was how to float a jeep. With further research, I came across an article in the Infantry Journal, May 1942 that covered just that. Of course, you can also use cable elevated high enough for the jeep to clear the water and run it across that way as well. What follows is the work of Cols. Wood and Hagerty. The original photos from the article appear to all be of the Bantam and one of the first 70 vehicles at that as the jeep display has the rounded nose hood. Additional photos have been edited from the Nothing but WW2 Jeeps DVD available from Vintage Video. All fighting units need to know a number of stream crossing expedients for use when the standard stream crossing equipment (bridges, pontons, boats) is not on hand, which will often happen in action. In order to get the maximum benefit from the training in these expedients. commanders should limit the gear used to equipment and materials that are of standard issue or that troops may reasonably expect to find on the scene of actual operations.
 The quarter-ton truck with a normal load (including men) can be launched, floated across a stream, and beached if both stream banks slope gently. Four men can do the job using any of the following methods: First wet the bank at the site of the launching in order to make it easy to slide the truck into the stream. Then spread the canvas cover of a 2-1/2-ton truck on the bank at the water’s edge and drive the quarter-ton truck onto the center of the canvas.
 Four men can slide the wrapped vehicle with its normal load of equipment into the water. It will float easily if correctly wrapped and tied.
 There are several ways of getting the vehicle across, the method used depending more or less on the depth and current. If the stream is not too deep the men can push it across by wading; it can be poled across by three or four men sitting in the vehicle using saplings or paddled across by three or Four men sitting in the vehicle using shovels as paddles. It can be towed across by using a light towing line such as a field telephone wire which is first stretched across the stream by a swimmer; towed across by running the cable of a truck winch on the near side of the stream through a snatch block attached to a tree on the far side, thence back to the floating vehicle or pulled across (hand over hand) by men on the vehicle; or along a rope or cable stretched across the stream and anchored at both ends. When the vehicle reaches the gently sloping bank on the far side of the stream, untie the ropes of the cover, drop the canvas and drive the vehicle out under its own power.
 Another way of getting a truck across a stream is to use two box frames made of saplings, each 1 foot 6 inches x 3 feet x 11 feet. The saplings should be notched and lashed together with small ropes or short lengths of field-telephone wire. Each frame is then wrapped in the canvas top of either a 2-½-ton truck or a 1-½-ton truck, which makes improvised pontons of them. The canvas is held in place by ropes tied around the pontoon. The quarter-ton truck is driven to the water’s edge between the two pontoons. Large saplings are securely lashed, horizontally, to the front and rear bumpers, with the ends of the saplings extending along the sides of the vehicle and above the ends of the pontons. The pontons are then securely lashed to these cross pieces, thus raising them a few inches off the ground. Disconnect the fan belt of the truck so that the motor won’t be flooded and drive the truck into the stream under its own power.
 Any of the propulsion methods used to get a wrapped-up truck across a stream will get the ponton job across. Then untie the bumper lashings, take off the front pole, and drive the truck out of the water under its own power. Don?t forget to replace the fan belt. If the bank of the stream is so steep that the vehicle can’t be driven out of the water under its own power, it may be pulled out by using the winch of a truck emplaced on the near side of the stream, the cable running through a snatch block attached to a tree on the far side. Another type of ponton can be made by constructing two outriggers each consisting of five inner tubes, 9 inches x 20 inches (from 2-½-ton trucks), and two stout saplings (upright poles for the large wall tent can be used). The inner tubes are inflated to a pressure of about eight pounds and lashed to the poles. If smaller tubes are used more of them will be needed. The quarter-ton truck is driven to the water’s edge and the outriggers are placed on the ground, one on each side of the truck. Large saplings (or ridge poles for large wall tents) are securely lashed horizontally to the front and rear bumpers, with the ends of the poles extending beyond the sides of the vehicle and above the ends of the outriggers. The outriggers are then securely lashed to these crosspieces. An additional inner tube is lashed under the front bumper of the vehicle to provide flotation for launching. The fan belt of the truck is disconnected and the vehicle is driven into the stream under its own power. Anyone of several methods of propulsion may be used and the vehicle is beached as described above. After beaching, the cross poles are unlashed from the bumpers and the rigging is lifted by hand over the truck and floated back to receive another vehicle.
 These methods of crossing the quarter-ton truck are not practicable when the current is very swift or the banks are steep and high. Here the aerial cable ferry will be found useful. In constructing a cable ferry it is important to have the ends of the cables anchored as high as possible so that there is considerable slack. Too little slack in the cables may cause enough tension to break them. Since winch-cables are normally 300 feet in length the spans of such cable ferries are limited accordingly. Two 2-½-ton trucks equipped with power winches are anchored against trees on the high, near bank of the stream. Light ropes or lengths of field-telephone wires are stretched across the stream and tile two winch cables are pulled across with these lines. The cables are secured to stout trees on the far bank at points well above the ground. The cables should be roughly parallel and about twelve feet apart. A quarter-ton truck is placed under the cables and rigged to snatch blocks by tow-chains attached to the front and rear bumpers. Slack is taken out of the cables by the winches to raise the vehicle off the ground. A sapling is lashed to the snatch blocks on the cables to keep the vehicle from swaying while being pulled across the stream. A bridle in the towing line will also prevent sway. An additional snatch block is attached to the base of a tree on the far bank. A light towing line is stretched from the near bank through this snatch block, returned to the near bank and attached to the vehicle. Four men on the near side can then pull the vehicle across. A quarter-ton truck may be rigged to two snatch blocks placed on a single cable from a 2-½-ton or 1-½-ton truck winch and pulled across in the same fashion. Picture Sources: Infantry Journal, May 1942


 ‘S’ symbol on the cowl of a 1942 Ford GPW and Army Jill sitting on the fender.
 An interesting closeup from a photo of a US Navy jeep in use with the US Marines… This is clearly marked as a US Navy vehicle.